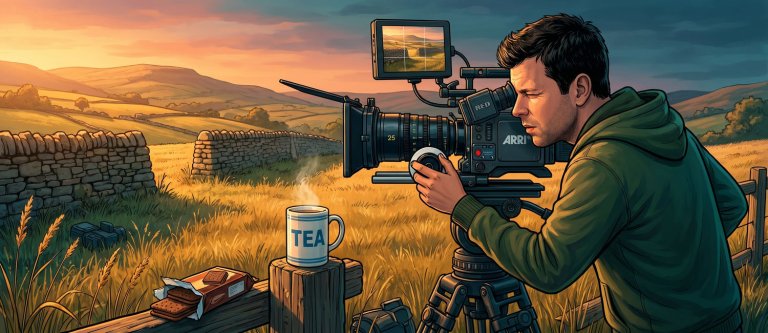

Cinematography tips are the kind of thing nobody gives you before they hand you a camera. Which means most of us learn the hard way: by picking one up for the first time, thinking yes, I understand this, I have watched films before, how hard can it actually be — and then finding out, in fairly short order, that it is quite hard. Harder than it looks. Harder than any amount of Netflix consumption will have prepared you for. Because watching films and making films are related in roughly the same way that watching someone parallel park and actually parallel parking are related — you think you’ve absorbed the principles, and then suddenly you’re in the real world and everything is at the wrong angle and someone is honking.
1. The Rule of Thirds Is Called a Rule For a Reason
Every cinematography guide starts here, which means every beginner reads it, nods knowingly, and then promptly ignores it the moment they start shooting. I know this because I did exactly that. For approximately two years, I framed everything dead centre like I was taking passport photos, and then I’d watch the footage back and wonder why it looked oddly flat, oddly static, oddly like the shot was just waiting for someone to do something interesting in it.
The rule of thirds is simple: divide your frame into a three-by-three grid, and put your subject at one of the intersecting points rather than plonked in the middle like a trophy on a shelf. Your brain — and more importantly, everyone else’s brain — finds this more naturally pleasing to look at. There’s space for the eye to move. The frame breathes.
Put your subject dead centre for long enough and your audience will feel it even if they can’t say why. Like a dinner that’s slightly underseasoned — they won’t complain, but they won’t rave either.
2. Light Is Doing More Work Than You Think
Here is the thing about light that took me an embarrassingly long time to internalise: it’s not just there to make the image bright enough to see. It’s doing the storytelling. The direction it comes from, the quality of it, whether it’s hard and sharp or soft and diffused — all of that is character work. All of that is tone.
Harsh overhead light makes people look guilty and tired. Soft light from the side makes them look interesting and slightly haunted, which is good for drama and not ideal for corporate testimonials. Golden hour — the hour after sunrise and before sunset — makes everything look like a film regardless of budget, which is why every cinematographer on earth turns into a slightly manic person when it arrives and it’s already twenty minutes gone.
The single biggest upgrade I made to my footage was learning to stop fighting available light and start working with it. Move your subject relative to the light source. See what happens when the light comes from behind them. See what it does to the edge of a face, the texture of a wall, the shape of a shadow. You don’t need a van full of equipment if you understand what light is already doing.
3. Your Camera Moves Should Mean Something
I went through a phase — and I suspect most people do — of moving the camera constantly, under the impression that movement meant energy. It does not. Movement means emphasis. Movement means: something is changing, or something important is happening, or we are following something the audience needs to follow.
A slow push in towards a character’s face means we’re getting closer to something — a revelation, an emotion, a decision. A pull back means distance, loss, isolation. A handheld shot that wobbles slightly means presence, immediacy, the feeling of being in the room. All of these are a language, and like any language, using the words in the wrong order just produces noise.
The shot that moves for no reason is the cinematic equivalent of someone who gestures too much when they talk. You stop listening to what they’re saying because you’re distracted by their hands.
If you find yourself asking “should I move the camera here?” — ask yourself what the move would mean, first. If the answer is “nothing in particular, it just looks more interesting,” try the static shot. You might be surprised.
4. Shoot More Than You Think You Need (And Then More Than That)
This one is about protecting Future You, who is going to be sitting in an edit suite wanting to strangle Past You for not getting a cutaway.
Coverage is everything. Get your main shot, yes — but also get the close-up of the hands, the wide shot of the location, the reaction on someone’s face, the thing in the corner that might mean nothing and might mean everything. Edit in the camera if you have to, but give yourself options. A film made in the edit is only as good as the options you walked away from the shoot with.
I have lost count of the number of times I’ve been cutting something together, hit a join that doesn’t quite work, looked at my footage, and found that the one shot that would fix it is the one shot I didn’t think to get. Future You is not grateful. Future You is sat in the dark eating biscuits and wondering why Past You was in such a hurry.
5. Colour Is a Conversation You’re Having Without Words
The colour of your image — not just in post, but in how you light and what you put in front of the lens — is communicating mood before a single line of dialogue lands. Cold blues and greys say one thing. Warm ambers and greens say another. Desaturated palettes feel like memory or dread. Vibrant, punchy colours feel like energy and life and possibly a soft drink advertisement.
This doesn’t mean you need to spend three weeks in colour grade making everything look like a prestige drama. It means knowing, before you shoot, what you want the image to feel like — and making choices that get you there.
Ask yourself: if this film were a room, what colour would the walls be? That’s not a pretentious question. That’s the actual job.
6. The Best Equipment Is the Equipment You Actually Understand
I have seen gorgeous footage shot on a phone. I have seen footage shot on a camera worth more than a reasonably-priced car that looked like nothing. Equipment is not the variable. Understanding is the variable.
Know how your camera handles light. Know where it struggles and where it shines. Know how to expose correctly — not just what the settings mean technically, but what they look like in practice, in your actual shooting conditions, at the times of day you’re actually shooting. Every camera has a character. Learn yours before you go chasing someone else’s.
The camera you have, understood properly, will beat the camera you want, operated blindly, every single time.
7. For The Love of Everything, Get Off Auto
Let’s talk about the cardinal sin. The one that cinematographers whisper about in hushed, slightly haunted tones. The one that has cost people time, money, and quantities of stress that probably ought to be measured in clinical units.
Leaving your camera on Auto.
I understand the appeal. Auto feels safe. Auto feels like the camera is helping. Auto is the camera saying: don’t worry, I’ve got this, go and be creative, I’ll handle the technical bits. And then Auto quietly, cheerfully, and with absolutely no malice whatsoever, ruins your shot.
Because here’s what Auto is actually doing: it’s making decisions based on what it thinks is happening, which is not the same thing as what is actually happening, and definitely not the same thing as what you want to happen. Auto sees a bright window behind your subject and decides to expose for the window, leaving your subject as a silhouette. Auto decides, mid-sentence, that the light has changed slightly and bumps the exposure up — while you’re recording. Auto hunts for focus like a dog that’s caught a scent, locking onto the background, then your subject, then the background again, while you watch helplessly from behind the viewfinder.
The F-stop — your aperture — is not just a technical setting. It controls depth of field. It controls how much of your frame is sharp and how much melts away into beautiful soft blur. Leave that on Auto and you’re not making a creative decision, you’re accepting whatever decision the camera makes on your behalf, which is the photographic equivalent of asking someone else to order for you at a restaurant and then having to eat it anyway.
Manual focus, yes, is harder. Yes, it requires practice. Yes, there will be shots where you pull focus slightly too early and spend the rest of your life thinking about it. But at least those are your decisions. At least you are the author of what’s in the frame. The camera on Auto is not your collaborator. It’s a very confident intern who means well and has no idea what the film is supposed to feel like.
Take control of your settings before you start rolling. Learn what they do. Make the choices. The stress of getting it wrong manually is, I promise you, considerably less than the stress of watching perfectly good footage become unusable because the camera decided something on your behalf at exactly the wrong moment.
These Cinematography Tips Are a Starting Point, Not a Finish Line
So that’s what I’ve got. Seven things I wish someone had stapled to my forehead at the start, instead of leaving me to discover them the long way, which mostly involved a lot of footage I will never show anyone and a recurring sense of puzzled disappointment at the gap between what I’d pictured and what I’d actually captured.
The gap closes. It closes slowly and it closes imperfectly and it never quite closes all the way, which is probably why this is worth doing in the first place.
What’s the cinematography lesson you had to learn the hard way? Drop it in the comments — bonus points if there’s a specific shot you’re still quietly furious about.
Further Reading
- The 7 Rules of Cinematic Framing and Composition — No Film School
- 5 Tips to Film Golden Hour — No Film School
- What is Deep Depth of Field? — No Film School
- Roger Deakins’ Cinematography Forum — rogerdeakins.com
Gary makes films, mostly on purpose, with varying degrees of success and a significant amount of post-shoot biscuits.
